

Discover our unique acoustic panels


Installation Guide
4 simple steps to creating a statement in your living space

Prepare the Wall
-
Ensure the wall surface is clean, dry, and flat.
-
Use a level to check that the wall is even.
-
Mark your installation starting point using a pencil and measuring tape.
Measure & Cut
-
Measure and cut the wooden panels to fit the height and width of your wall.
-
Use a fine-tooth saw or a jigsaw for precise cuts.
-
For outlets or obstacles, mark and cut the required shapes on the panels.

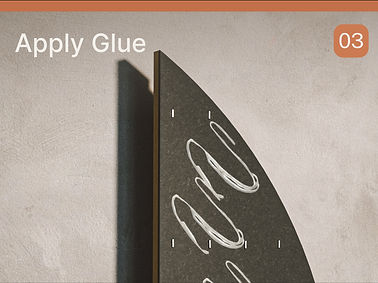
Attach Panels
-
Apply a high-quality “no nails” adhesive in vertical lines on the back of the panels.
-
Press the panels firmly against the wall, starting from your marked point.
-
Ensure proper alignment with a level before moving to the next panel.
Finishing Touches
-
Fill any gaps between panels with wood filler for a seamless look.
-
Sand lightly if needed, and wipe away any dust.
-
Optionally, apply a finishing oil or varnish for protection.

